When your computer runs slowly, encounters system errors, suffers from severe virus infections, or needs to upgrade to a newer version of Windows, reinstalling Windows is an effective solution to restore performance and stability. There are several ways to install, such as clean installing from a bootable USB, upgrading directly from the current Windows, or recovering using the available Recovery partition. However, for those who have never done it before, these steps can be confusing. In this article, we will provide detailed instructions for each method, from preparation to complete setup after installing Windows 10 or Windows 11.
1. What is Windows?
Windows (full name: Microsoft Windows) is an operating system (OS) developed by Microsoft, first released in 1985. It is the foundational software that allows computer hardware (CPU, RAM, hard drive, monitor, etc.) and application software (Word, Excel, web browsers, etc.) to communicate and operate together.
Windows stands out with its intuitive graphical user interface, supporting input via mouse, keyboard, and touchscreen, making it easy for users to operate even without deep technical knowledge.
2. Uses of Windows
- Manage and control hardware
Windows helps allocate hardware resources such as CPU, RAM, and hard drive to applications, ensuring smooth system operation. - Software platform
Office applications, design software, games, and more all require an operating system to run, and Windows is currently the most popular platform. - User interaction
Provides a user-friendly interface with icons, windows, menus, and more to facilitate easy operation. - Support for connectivity and sharing
Windows integrates networking features, allowing Internet access, file sharing, and printing over LAN or Wi-Fi. - System security
Windows is equipped with security tools such as Windows Defender, firewall, BitLocker encryption, helping protect data and prevent malware.
3. Installing Windows
3.1 Preparation:
Backup data: copy all important folders (Documents, Desktop, Downloads, Browser bookmarks, email, etc.) to an external hard drive, Google Drive, or use cloning software (Macrium Reflect, Clonezilla).
Record the Product Key (if available) or sign in with your Microsoft Account if the previous Windows activation was linked to it. (You can choose “I don’t have a product key” during installation and activate later).
Check compatibility (if installing Windows 11): requires TPM 2.0 and Secure Boot. Quick check:
- Press
Windows + R→ typemsinfo32→ Enter → In System Summary, checkSecure Boot State(On/Off) andBIOS Mode(UEFI/Legacy). - Check TPM:
Windows + R→ typetpm.msc→ Enter (if TPM is present, information will be displayed).
Prepare hardware: USB drive with at least 8GB (16GB recommended). USB 2.0 or 3.0 port — if the computer is old, try USB 2.0 port if USB 3.0 fails to boot.
3.2 Download Windows ISO file
Go to the official Microsoft website (or a trusted source) → download the ISO file for Windows 10 or Windows 11.
(Optional, for safety) Verify the ISO hash to ensure the file is not corrupted: open Command Prompt (Admin) and run:
certutil -hashfile "C:\path\to\Win.iso" SHA256Compare with the SHA256 provided by Microsoft (if available).
3.3 Create Bootable USB — 2 common methods (Media Creation Tool and Rufus)
Method A — Using Media Creation Tool (easy, suitable for most users)
- Download the Media Creation Tool (MCT) from Microsoft.
- Run the tool → select Create installation media (USB flash drive, DVD, or ISO file) → Next.
- Choose language/edition/architecture (or use recommended settings).
- Select USB flash drive → Next → choose the USB drive → The tool will download and create the USB (Internet connection required).
- Done → USB is ready, compatible with UEFI + Secure Boot in most cases.
Advantages: easy, fewer UEFI/FAT32 errors.
Disadvantages: requires internet, limited customization.
Method B — Using Rufus (more options, suitable for advanced users)
- Download Rufus (portable) → run it.
- Plug in the USB → in Rufus, select:
- Device: select your USB.
- Boot selection: choose the ISO file (click SELECT → navigate to the ISO file).
- Partition scheme:
GPT→ for UEFI (non-CSM) — modern (recommended if your system supports UEFI).MBR→ for Legacy BIOS or UEFI-CSM (only use if the system is old).
- Target system will automatically change according to the Partition scheme.
- File system:
FAT32for UEFI + Secure Boot; if the ISO is >4GB, Rufus offers the option to use NTFS + “UEFI:NTFS” (Rufus will handle it) — prefer FAT32 for safety. - Leave the cluster size as default, set the Volume label (optional).
- Click START → Rufus may prompt you to choose “ISO Image mode” or “DD mode” — select ISO Image mode unless otherwise instructed.
- Wait for Rufus to finish writing → safely eject the USB.
Note on Rufus + Windows 11: if the ISO contains large files (>4GB) and you want FAT32, Rufus can split the files automatically or use NTFS+UEFI:NTFS; alternatively, use the Media Creation Tool (MCT) to avoid issues.
If USB creation fails — clean the USB using diskpart
Open Command Prompt (Admin) → type:
diskpart
list disk
select disk X      (X là số USB, **kỹ**: kiểm tra dung lượng để chắc)
clean
create partition primary
format fs=fat32 quick
assign
exit4. Configuring BIOS / UEFI to Boot from USB
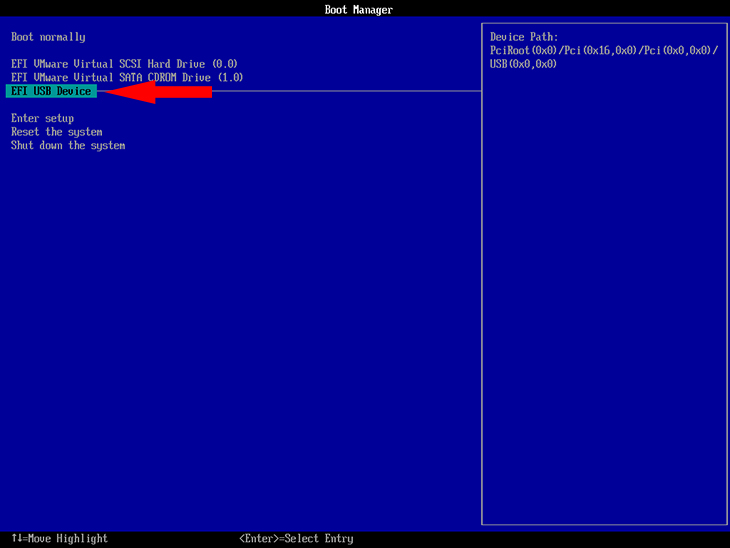
- Plug the USB into the computer. Restart → enter BIOS/UEFI or Boot Menu:
- Boot Menu: F12, F9, ESC (depending on the manufacturer).
- BIOS/UEFI: Del, F2, F10 (depending on the machine).
- In UEFI:
- Set Boot Mode = UEFI (if the USB is created for UEFI/GPT).
- Disable Fast Boot temporarily if you encounter errors.
- Secure Boot: usually kept ON for official ISOs; if the USB uses NTFS to boot (when Rufus uses UEFI:NTFS) and you encounter errors, you can temporarily disable Secure Boot to install, then enable it again (only if you know how to do it).
- Set USB as the first boot device or use the Boot Menu to select USB.
Warning: Changing UEFI/TPM/Secure Boot settings may pose a risk. If unsure, only modify the boot order or use the Boot Menu.
5. Steps to Install Windows
5.1 Boot from USB → the Windows Setup screen will appear.
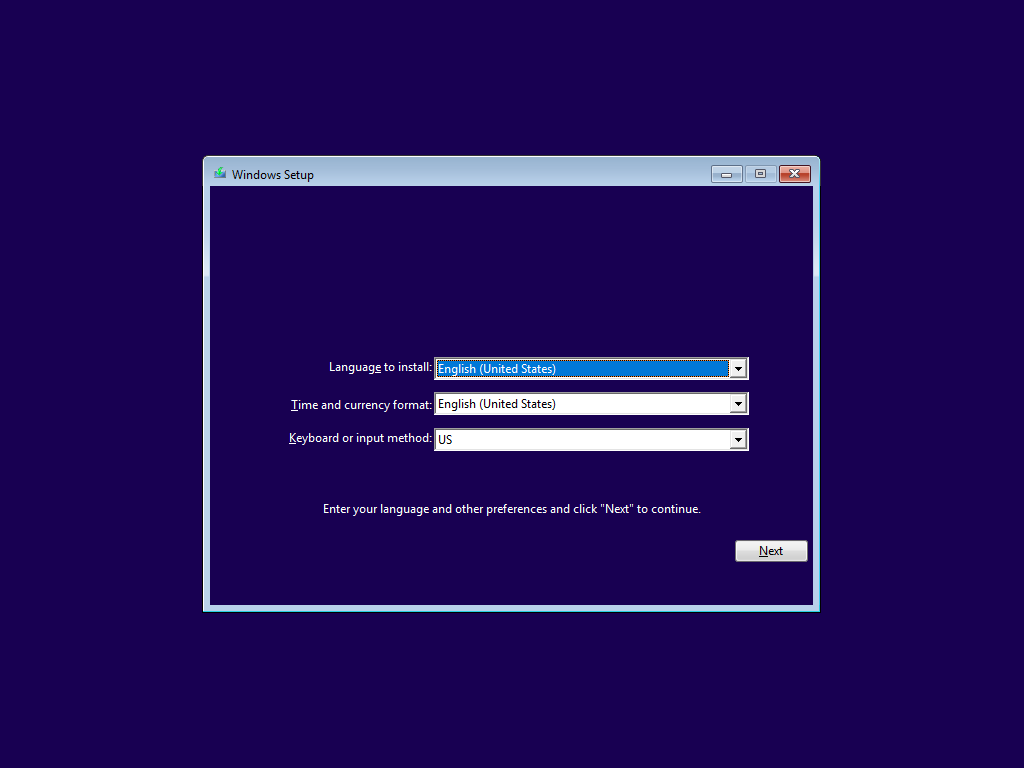
5.2 Select language, time, and keyboard layout → Next → Install now.
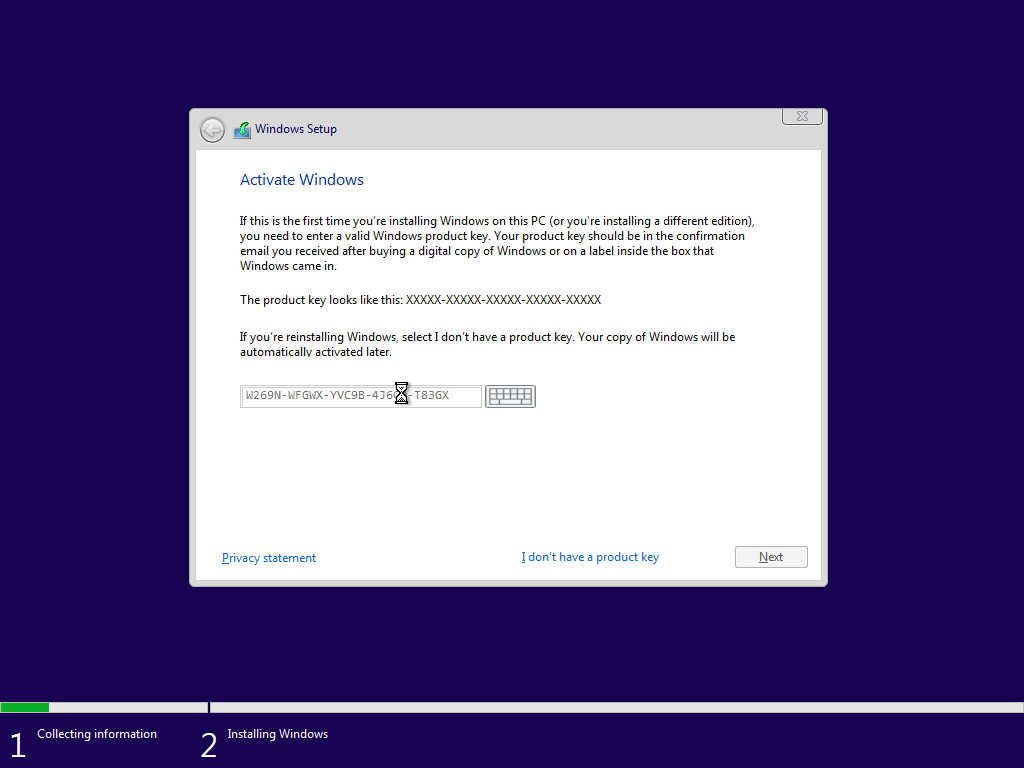
5.3 Product key: enter if available, or select I don’t have a product key (choose the correct version).
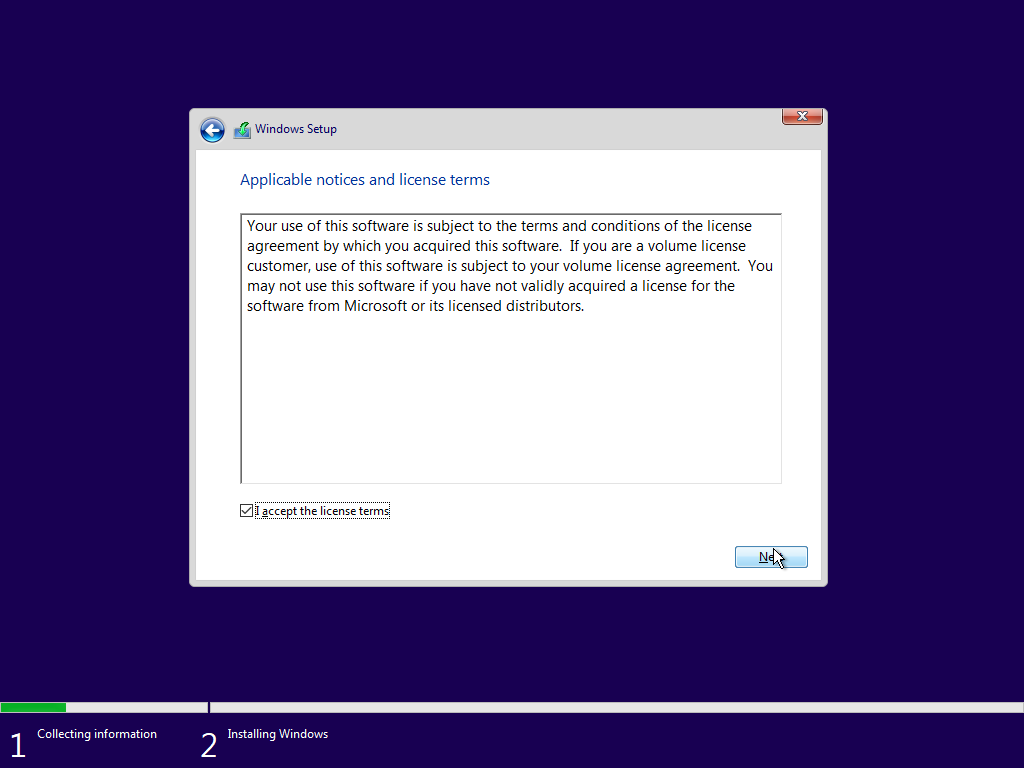
5.4 License terms → select I accept → Next.
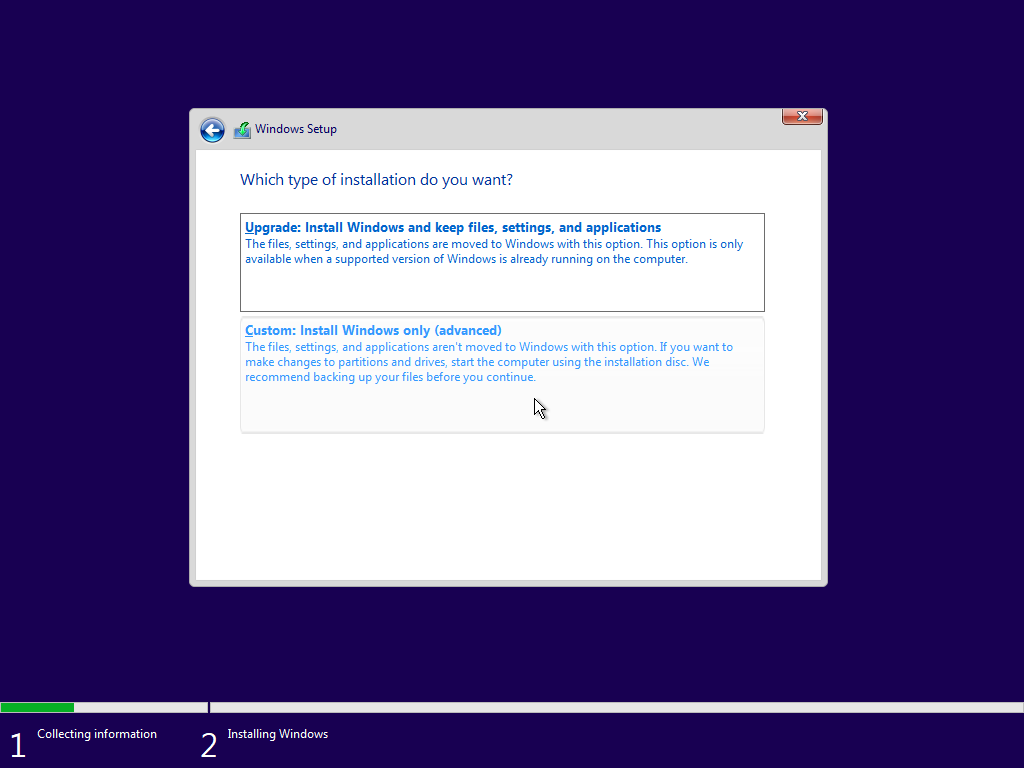
5.5 Type of installation: select Custom: Install Windows only (advanced) to perform a clean installation.
5.6. Partition management:
- If you want to keep other partitions (data), only format the partition for installation (usually drive C) → select the partition → Format.
- If you’re unsure: back up first.

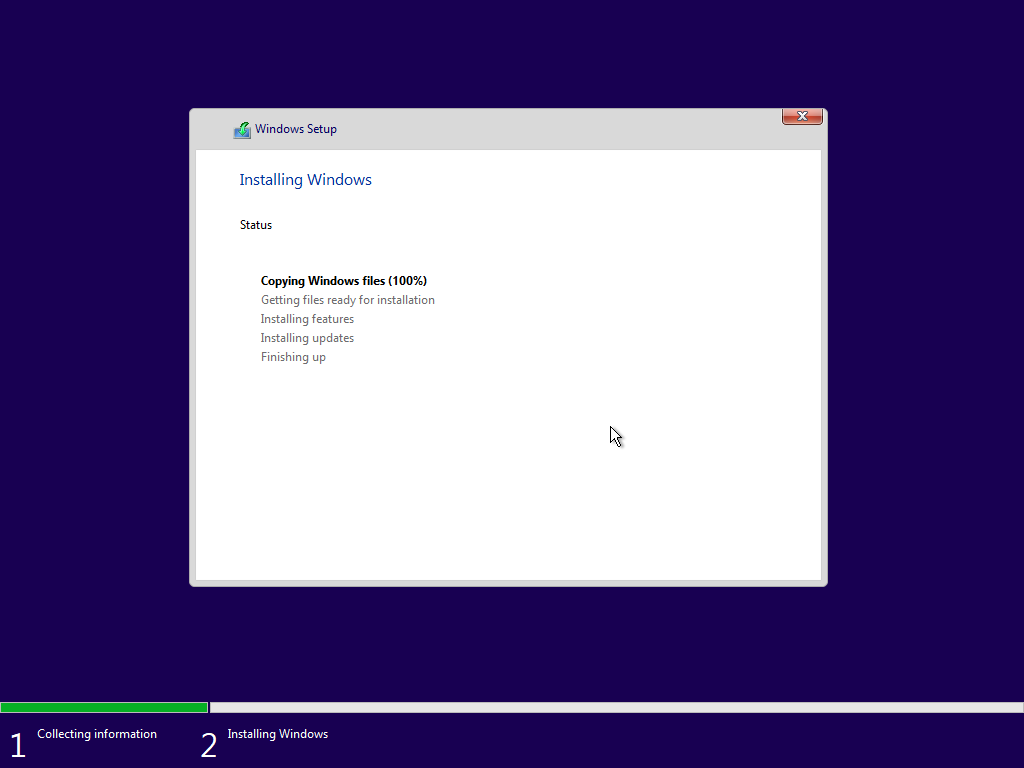
5.7 Copy & install process: Windows will copy files, expand, install features, install updates, and reboot several times (do not remove the USB during installation!).
5.8 After restart, Windows will enter OOBE (Out-of-Box Experience): select region, keyboard layout, connect to a network, create a user:
- Select Local Account or Microsoft Account (Microsoft account supports automatic activation).
- Set up password/PIN, configure privacy settings (telemetry).
5.9 Go to Desktop → Windows completes the basic installation.
6. Advanced Commands & Operations (if needed)
- Diskpart to erase & format the hard drive before installation (when you want to wipe the entire drive): bashCopyEdit
diskpart list disk select disk 0 (choose the installation drive, **note**) clean convert gpt exit
Then return to Setup → click Refresh → create a new partition or let Windows create it automatically. - Convert MBR to GPT (when you don’t want to reinstall): use
mbr2gpt.exe(only for Windows 10 1703+ and under certain conditions). This is an advanced operation — proceed with caution and back up first.
7. After Installation is Complete
- Update Windows: Settings → Update & Security → Windows Update → Check for updates.
- Install drivers: Chipset (motherboard), LAN/Wi-Fi, GPU, audio. It is best to download drivers from the manufacturer’s website (ASUS, MSI, Dell, HP…) or from Intel/AMD/NVIDIA websites.
- Check Device Manager: see if there are any devices missing drivers (yellow exclamation mark).
- Activate Windows: Settings → Update & Security → Activation. If using a Digital License linked to a MS Account, sign in.
- Install essential software: Browser, Office, antivirus software (Windows Defender is quite good by default), backup software.
- Create a Recovery Drive: Windows → Create a recovery drive (using a USB) for future recovery.
- Create a Restore Point (System Restore): Control Panel → System Protection → Create.
8. Common Errors & Quick Fixes
- USB not booting: check the Boot Menu, try a different USB port (USB 2.0), verify that Rufus/MCT created the bootable USB successfully.
- “Windows cannot be installed to this disk. The selected disk has an MBR partition table.” → A UEFI boot machine requires GPT: convert the disk to GPT using
diskpart clean+convert gpt(this will erase all data). - “We couldn’t create a new partition or locate an existing one” → try: unplug the USB, plug it into a different port; or in Command Prompt (Shift+F10), use diskpart clean → then Refresh in setup.
- Corrupted ISO / damaged file: check the checksum using
certutil -hashfile. Re-download if incorrect. - Network missing after installation: install LAN/Wi-Fi drivers using the file from USB.
9. Practical Tips
- Always backup in 2 locations (external hard drive + cloud) before deleting partitions.
- If you’re unsure what GPT/MBR/UEFI/Legacy are: choose the default (MCT creates the correct one for your machine).
- For laptops with a Recovery partition from the manufacturer: if you use Recovery, it will restore the system to its original state (with bloatware). If you want a clean system, install from a bootable USB.
- Keep the installation USB after setup (to use for repairs if needed).
- If you want to reduce risks, perform a test installation on a virtual machine (VirtualBox, Hyper-V) to familiarize yourself with the process.
10. Conclusion
Reinstalling Windows is not too complicated if you follow the steps carefully. Installing Windows yourself gives you more control in troubleshooting system issues, and helps you save costs instead of taking it to a shop. However, you need to back up all important data before proceeding and ensure that you download the ISO file from a trusted source to avoid risks.
If you encounter difficulties at any step, make a note of the specific error to search for solutions or consult a reputable technical support community.